Data Preservation & Imaging Diskettes
| stub page. You can help the Sierra Wiki by expanding it. |
Introduction
Preservation of the original data on the distribution media is increasingly important given how vulnerable that data is. Even with careful handling and storage of the media to protect them from physical damage, the data can be subject to "bit rot". This degradation of the data can come from poor quality diskettes, being written with certain error prone floppy controllers, incidental magnetic fields and other factors. The best way to stem this tide and preserve the data itself is to copy the data to other means of storage. For some games this can be as simple as copying the files on the disks to a hard drive to store on a hard drive, burn to CD/DVD, web folder or server. To do this requires being able to read the disks. Accessing this data is the the first obstacle to preservation. Modern PCs usually no longer included floppy drives.
The Retro PC Solution
One of the most obvious solutions is to use an old PC from the era that has an old floppy drive. This is not necessarily the best solution. First, you must have to have the extra space for the old PC. If you have 3.5" and 5.25" diskettes to archive you need to have both 3.5" and 5.25" drives to read them. Disks for other platforms often are not readable with a PC drive and controller. Even if you do setup an ancient PC to access the data on the diskettes, you need to have some way to get the data out of the old PC. If it is recent enough to have USB or has a PCI bus for an aftermarket USB controller you can use a USB thumb drive. You can add a network interface controller to connect to your network or broadband modem. You can also add a CD burner. With these solutions you will need to track down older versions of the support software, such as a burning program.
External USB Drives
A more tenable solution for most is to use an external USB floppy drive. These are affordable and readily available, but be sure to get a drive that can read both DD (double-density) and HD (high-density) disks.
5.25" USB drives are rare to non-existent. It is possible to get a USB floppy controller that you can connect an old internal 5.25" drive. Device Side Data has one for $55.25.
Even with these drives you can still encounter problems accessing the data. You will not be able to directly read disks not formatted in FAT12. Disks from other platforms may require floppy drives and controllers designed for those platforms. For Mac disks you can use a utility like HFV Explorer to access the data. Corrupted data will require additional steps to recover the data. There are a number of programs out there that can help in many cases. For PC disks there is the freeware Roadkil's Unstoppable Copier.
The Problem of Uncopyable Data
However, there are some cases where simply copying the files is not a solution. It is often important to preserve other aspects of the original media, such as directory structure, disk labels, etc. Disk images can usually capture all of the extra information, thus is a better solution for archival purposes. Identical disk copies can be made from the images. While there are several programs that can do this, many of the standard programs are now dated DOS only programs, such as RawRead/RawWrite, TeleDisk, the MS Diskcopy and several others. The best known modern solution with a GUI for this task is WinImage.
Another problem we'll encounter is the preservation of disks from other platforms that cannot be read natively in modern Windows. The lack of a proper driver to read platform specific formats or even hardware differences can make it difficult or nearly impossible to do so. Apple, Atari, Amiga Commodore 64 and Mac disks require additional measures to access the data.
Then we must take into account that not all data cannot be easily imaged. Some copy protections schemes of the floppy era present extra hurdles. The [1]Copy Protection Control (CPC)] that Sierra used for several of their AGI game releases utilized a fake bad track to hide part of the copy protection that the interpreter would check to obtain the decryption key pass to the executable. Without this track, the game will not start. Since the OS saw this as a bad track, it would ignore it and could not copy it, either as raw files or as part of a disk image. Dealing with some of these disks could be dealt with using special hardware, such as the old COPY II-PC option board, using an OS that allows low level access. For more on the CPC protection scheme, see [2]this post].
Modern Solutions
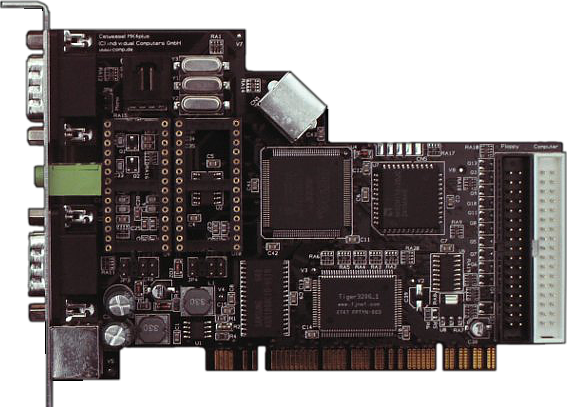
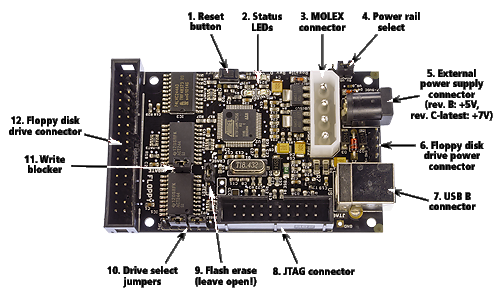
There are modern solutions for imaging these problematic disks. There was the [3]Catweasel], which many considered not completely satisfactory and seems to now be defunct. The KryoFlux from the [4]Software Preservation Society] provides a floppy controller that can interface with a modern computer (Windows, Mac and Linux) via USB.
It reads the magnetic flux from the spinning disk regardless of the format or the hardware that the disk was intended. This data is used to create a byte perfect, archival quality image of the disk, including disk format and any hidden copy protection tracks.
https://www.youtube.com/watch?v=CqLv8d-W-9c#t=1010
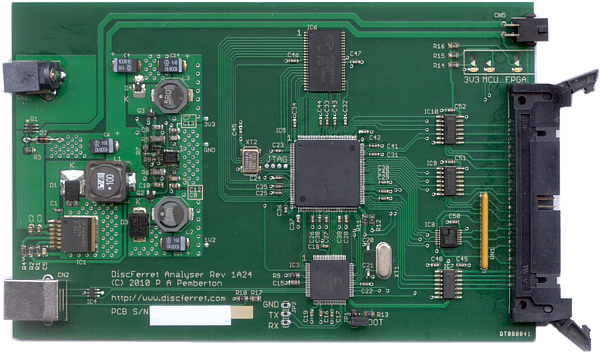
The KryoFlux In ActionAnother solution that is in development is the DiscFerret. It too, reads the magnetic flux from the spinning disk. Currently is is about twice as expensive as the KryoFlux and is not as well developed
This could be one to keep an eye on in the near future.
An Imaging Station
You can build an imaging station for your KryoFlux or DiscFerret controller.
Supplies Required
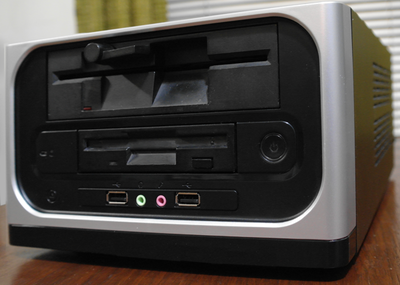
Any 2 bay (with at least one 5.25" bay) Mini-ITX case with power supply will do, such as this one from Directron. Besides the case and the KryoFlux you will need:
- 4 small plastic circuit board standoffs from any computer store with a systems builder department like Micro Center.
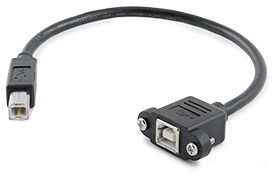
- A 6" to 12" USB 2.0 type B female to type B male panel mount cable (Search on Google)
- A latching switch to replace the case's momentary switch (check a computer store with a systems builder department).
- A piece of sheet metal ~ 6 5/8" x 2 1/4" to cover the opening for the intended motherboard's back plate.
- 5.25" and 3.5" floppy drives (check the KryoFlux forums for compatible drives) - (Search eBay for 5.25" floppy drives or 3.5" floppy drives)
Preparing the Case
Next the case and power supply will need to be modified.
- Power Supply Modifications
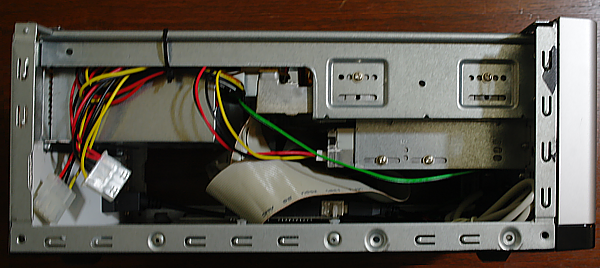
Since the power supply will not be connected to a motherboard, the "soft power" on/off will not work, so you will need to switch a green and black line from the motherboard connector to turn it on and off. The switch that is in the case is momentary switch and will need to be replaced with a latching switch. Connect any green and black wire from the motherboard connector to turn it on and off.
If you do not want all of the extra wires crowding the case and you are handy with a soldering iron you can unsolder the extra, unneeded leads from the power supply that normally supply power to an ITX motherboard to reduce the clutter inside the case.
Case Modifications
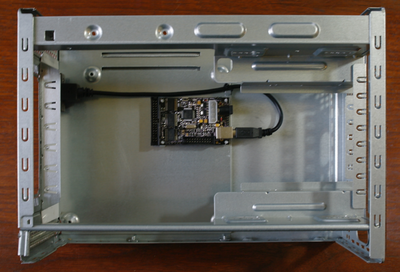
Mount the KryoFlux;
- First drill holes in the case's base plate to mount the KryoFlux. Add non-conductive standoffs to the bottom plate inside the case to mount the KryoFlux. Be careful with mounting it as the mounting holes of the KryoFlux are smaller than standard.
- Set the drive select jumpers on the KryoFlux to two drives if you will have both a 5.25" and 3.5" drive connected (see KryoFlux manual).
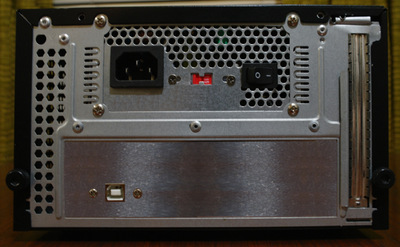
- Use a piece of sheet metal to cover the motherboard backplate opening.
- Since there was no USB header, just a type B female jack, I used a 12" type B male to panel mount female cable to add a USB connector to the back of the case for the KryoFlux.
- Mount the USB 2.0 type B cable through the replacement back plate and connect the other end to the KryoFlux.
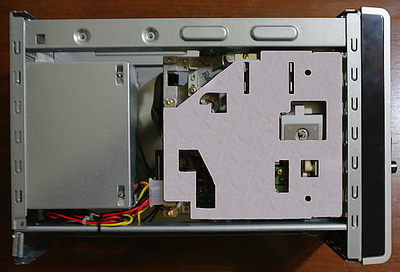
- Mount the drives in the box, connect the power cables to them and connect the drives to the KryoFlux with a floppy ribbon cable. Be careful to match pin one on the drives with that of the ribbon cable.
- Replace the case's cover
You now have a fully functioning device to read both 3.5" and 5.25" disks that can be connected to a modern PC with USB.
Installing the Imaging Station
Next the KryoFlux driver needs to be installed and the drives calibrated. See the KryoFlux Manual for information on installing the driver and calibrating your floppy drives]
Follow the KryoFlux manual to install the driver. Connect the power and USB and you will be ready to calibrate your drives before using the unit.
Creating Disk Images
You can use either the KryoFlux program from the command line or from the included SPS Java based GUI.
Since the KryoFlux is not a normal floppy controller you cannot simply access your disks via Windows Explorer. This is a forensics level device. It is designed to extract [b][i]all[/i][/b] of the data on disks. It does so by reading the magnetic flux from the spinning disks. This allows it to read the data, even if the disks are formatted for other platforms or the data is for copy protection on hidden "bad" tracks. The KryoFlux has a small command line program DTC.exe to interface with the controller. You use it to create an image of a disk. DTC.exe is a command line based tool. Arguments for it can be found in the KryoFlux Manual.
KryoFlux Frontends
Official Java Frontend
DTC.exe also comes with a Java based user interface or frontend to control DTC.exe.
Other Options
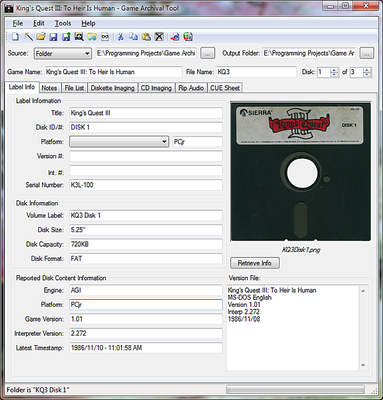
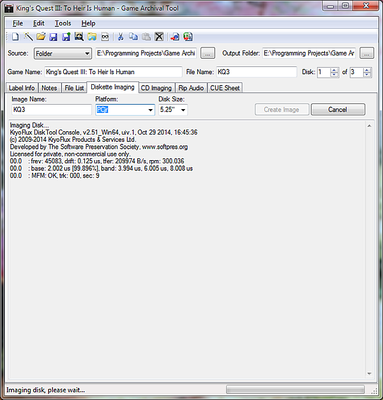
Custom frontends can be written to build DTC arguments via a GUI that interfaces with the main KryoFlux program (DTC), such as this one:
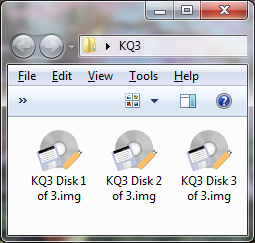
The end result will be an IMG file of each of the three disks.
Working With the Images
The KryoFlux can create archival images that capture all of the data on the disks, but the files in it will not be readily available. The KryoFlux can also create standard images, such as *.IMG. The files contained in these images can be extracted with a standard disk imaging program like Winimage.
Data Recovery
If you encounter diskettes that are unreadable or have corrupted files that cannot be read see the Data Recovery article.
References


